|
|
||||||||||||||||||||||||||
the author
Interviewed and translated by
This article
in english
Download pdf
|
Making a tapered bag bellowsby Daniel W. Fromm
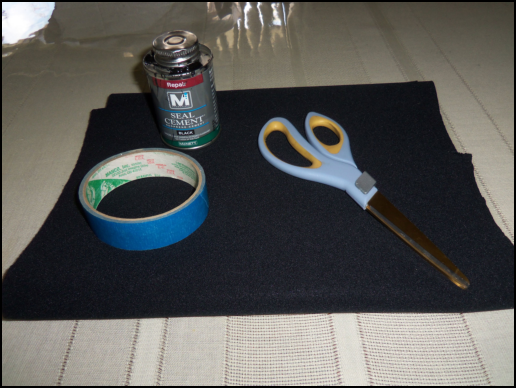
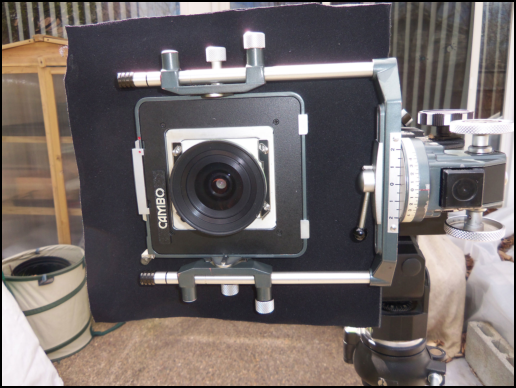
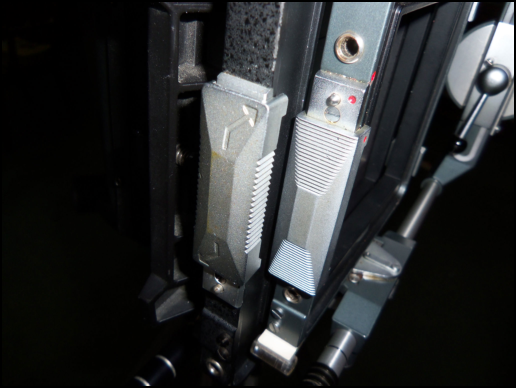
Contents2 Making a bag bellows 3 Field tests and improvements SummaryDan Fromm explains how he made a bag bellows for use with lenses of ultra short focal length on a 2''x3'' or 4''x5'' view camera. 1 Why I need a bag bellowsI wanted to shoot 6x12 with short lenses so I assembled Cambo parts to make a camera that could hold my lenses on 2x3 Graphic boards in front of a 6x12 back. Parts used: one each 2x3 and 4x5 Cambo SC standard, a reversible Graflok back to fit the 4x5 standard, a tapered bellows (Cambo SF-72, 2x3 at one end, 4x5 at the other), a rail and a tripod mounting block. All but one of my lenses are on 2x3 Pacemaker Graphic boards. I have an SKGrimes adapter built around a 2x3 Cambo board and a 2x3 Pacemaker Graphic front standard that fits a 2x3 Cambo standard and accepts the lenses on their Graphic boards. It gives the same flange-to-film distance as a flat 2x3 Cambo board. With the SF-72 fully compressed flange-to-film distance is ∼ 67 mm so the camera needs a bag bellows to be able to use really short lenses. Cambo's tapered bag bellows (SF-322, 2x3 at one end, 4x5 at the other) cost $340 plus shipping from Calumet, now out of business, when I went shopping for one. This is more than I wanted to spend so I made an ugly little bag bellows. 2 Making a bag bellows2.1 Choice of materialsAfter looking at accounts of making bag bellows on the Internet I sent two Cambo boards (one each 2x3 and 4x5) to SKGrimes to be converted into bellows frames, bought a sample of foam neoprene fabric as used in making wet suits from http://www.rockywoods.com and bought a can of black McNett neoprene cement via amazon.com. SKGrimes charged less for the work than a good grade of Dremel tool would have cost.
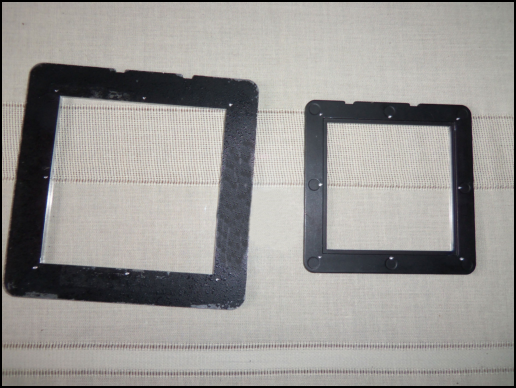
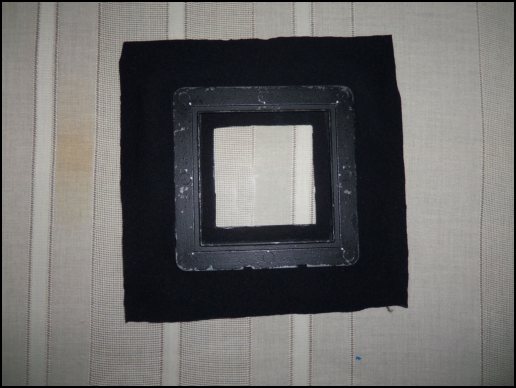
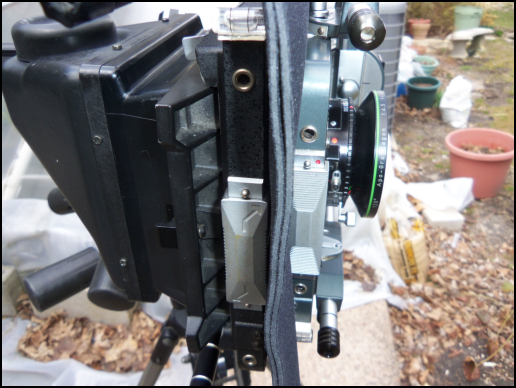
Figure 2: Frames for my tapered bag bellows The fabric is opaque. Neoprene cement is a kind of contact cement that is flexible when cured. I checked that the fabric and cement would serve. The cement seemed to glue fabric to fabric very well, and seemed to hold it to a lens board just well enough, i.e., one has to pull hard to separate the fabric from the board after the cement has set. Reassured by these little tests, I bought a 12” length (52” wide, that’s how they sell it) of 1.5 mm foam neoprene fabric from Rockywoods. My bag bellows is the simplest possible, two 10” squares of 1.5 mm black foam neoprene fabric with the bellows frames cemented to them and cemented together at the edges. The bonding areas at the edges are ½ ” wide, the bonding areas on the frames are as wide as possible, subject to leaving clearance for attaching the frame to the standard. Fully extended the bellows is ∼ 75 mm long. To give credit where credit is due, I followed the approach Franz-Manfred Schüngel published at [1] http://www.foto-net.de/net/dyo/gross_ww.html. His and my bag bellows are very different but incorporate the same idea. 2.2 ProcedureMark the fabric for cutting, cut out 10” squares, then cut a square hole in each square, centered in the fabric, to match a frame’s opening. Mask the frames and fabric so that no cement will reach the frames’ edges and so that the bonding areas between frames and fabric won’t interfere with the carrier frames’ lens board sliders or retainers. I used blue masking tape left over from an interior painting project. Take care to mask the frames’ edges before applying cement to them; if any cement gets on their edges the frames won’t fit the standards’ carrier frames. Apply cement, peel off the masking tape, align the frames with their squares, press together, let the cement cure for 24 hours. Attaching the frames to the squares before cementing the squares together greatly reduces the risk of inadvertently cementing the squares together in the middle. Mask the squares so that there will be cement only on the bonding areas, apply cement, peel off the masking tape, align the squares’ edges and press together, let the cement cure for 24 hours.
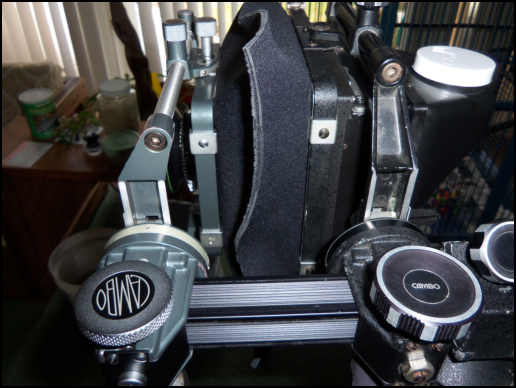
The bag bellows I made is quite short. The larger the fabric square, the longer the bellows can extend.
My 6x12 rig is not quite perfect. It will focus all but one of my lenses that cover 6x12 to infinity. The unfortunate exception is a 60/14 Perigraphe mounted in front of an Ilex #3. The shutter is so thick that even with no bellows and the two standards’ carrier frames touching the lens won’t focus to infinity. I’ve tried the exercise with the lens in front of an Alphax #3, a slightly thinner shutter; the Alphax is also too thick. I’ve since had SKGrimes modify a recessed 2x3 Cambo board to accept the truncated Ilex shutter on 2x3 Graphic board on which I front mount my 60/14, 75/14 and 90/14 Perigraphes. The adapter is needed only for the 60/14. Having it made was pure self-indulgence. I have a 58/5.6 Grandagon and a 65/8 Fujinon SW that both more than cover 6x12 and are more luminous than the 60/14 Perigraphe. You can read about the truncated shutter and lenses in my article on 2”x3” [6x9 cm] lenses [2]. And that was the first version. Read on for modifications.
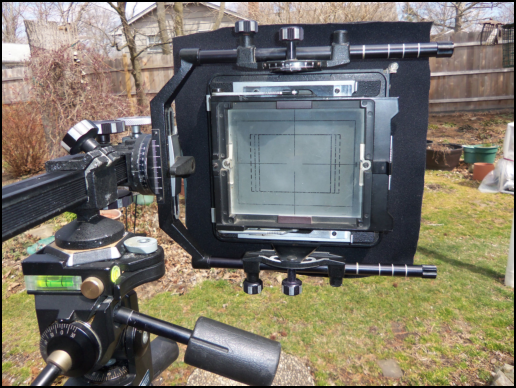
3 Field tests and improvementsMy bag bellows worked well enough for a few weeks. When the camera is set up with the rear standard reversed, it will focus a 35/4.5 Apo Grandagon mounted on a flat board through infinity. At least 10 mm of decentering movements are possible with the 35, but because the standards’ carrier frames nearly touch with the lens focused to infinity only very small tilts and swings are possible. When the rear standard is reversed the camera must be turned on its side to shoot in landscape orientation. After several weeks, however, the cemented seams opened. I think that the problem was due to following the directions for cementing (apply cement; let dry for five minutes; apply cement; let dry for ten minutes; press the surfaces together). Applying cement to 76 square inches of surface took some time, and I think the cement was too dry at the end. That or I didn’t apply enough cement. I took apart the test strips, applied cement, immediately pressed the surfaces together, and let the strips sit for several days. They adhered better than previously so I reglued the bellows, this time did a very poor job of aligning the two panels. After the cement had set well my wife very kindly sewed the panes together, trimmed the mismatched edges, and ironed on black seam tape, also from Rockywoods. The tape is not opaque, was put on to make the panels’ edges look neater, not to keep light out. Emmanuel Bigler tells me that Arca-Swiss bag bellows are made similarly. Two flat pieces of leather, with centered holes, are sewn together, turned inside out, and the bellows frames are glued to the leather. Turning the leather inside out after sewing the pieces together puts the thread and the holes it passes through inside the bellows, may prevent light leaks. I think, though, that Arca-Swiss turns the sewn leather squares inside out to make a prettier bellows. I’m lazy and don’t need pretty bellows, so didn’t turn mine inside out. A more important difference is that Arca-Swiss uses screws as well as cement to hold the frames and leather together. Cambo uses a similar method to hold their bag bellows’ fabric to the frames: cement and, depending on the bellows’ size and vintage, screws with washers or screws and metal strips. Adam Dau of SKGrimes thinks that this sort of strain relief is necessary, so drilled small pilot dimples in the bellows frames he made for me. If I ever pull my little bag bellows’ neoprene away from a frame I’ll think hard about drilling, tapping, ... My 6x12 rig incorporates pieces from my failed Baby Bertha project [3] and made to let me use my lenses on Graphic boards on a gift 2x3 Cambo. With the pieces and the gift 2x3 Cambo my 6x12 rig seems to have cost little more than one built around a 4x5 monorail, including purchase of the monorail, bag bellows, boards, ... 2x3 Cambos are uncommon and somewhat expensive. No one else is likely to have the pieces I’d made for other projects. I therefore can’t recommend that anyone try to copy my 6x12 rig. Who wants a 6x12 camera that incorporates a Cambo monorail should start from a 4x5 Cambo. The ideas incorporated in my 6x12 rig’s ugly little bag bellows though, should be useful for most, if not all, view cameras with interchangeable bellows. Notes & References
|
|||||||||||||||||||||||||
|
This article
in english
Download pdf
dernière modification de cet article : 2017
|
||||||||||||||||||||||||||
|
||||||||||||||||||||||||||


